-
 Add to basketQuick View
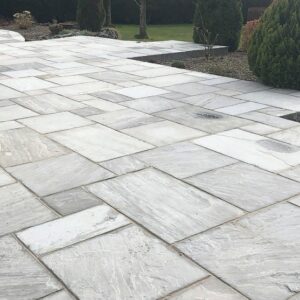
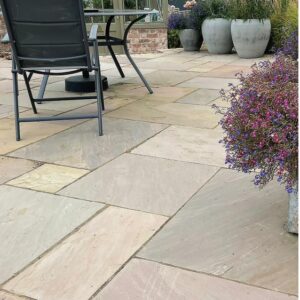
KANDLA GREY INDIAN SANDSTONE 22MM
Our range of porcelain and sandstone slabs include delivery throughout mainland England, Wales and Scotland. Please place the order for collection and we will arrange delivery in 3 to 5 working days£490.00Add to basketQuick View -
 Add to basketQuick View
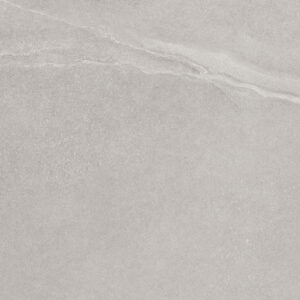
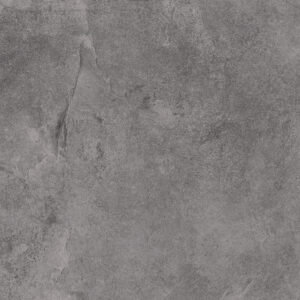
SOLACE GRIGIO 20mm Porcelain Slabs
Our range of porcelain and sandstone slabs include delivery throughout mainland England, Wales and Scotland. Please place the order for collection and we will arrange delivery in 3 to 5 working days£561.82Add to basketQuick View -
 Add to basketQuick View
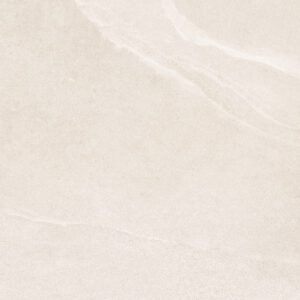
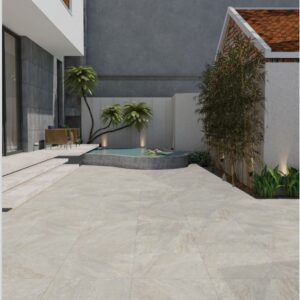
SOLACE IVORY 20mm Porcelain Slabs
Our range of porcelain and sandstone slabs include delivery throughout mainland England, Wales and Scotland. Please place the order for collection and we will arrange delivery in 3 to 5 working days£561.82Add to basketQuick View -
 Add to basketQuick View
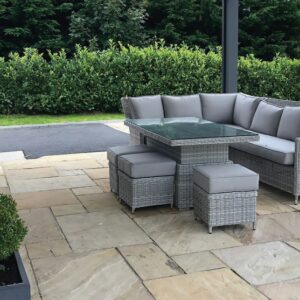
SOLACE PERLA 20mm Porcelain Slabs
Our range of porcelain and sandstone slabs include delivery throughout mainland England, Wales and Scotland. Please place the order for collection and we will arrange delivery in 3 to 5 working days£561.82Add to basketQuick View -
 Add to basketQuick View
MINT INDIAN SANDSTONE 22MM
Our range of porcelain and sandstone slabs include delivery throughout mainland England, Wales and Scotland. Please place the order for collection and we will arrange delivery in 3 to 5 working days£495.00Add to basketQuick View -
 Add to basketQuick View
HORIZON BONE 20mm Porcelain Slabs
Our range of porcelain and sandstone slabs include delivery throughout mainland England, Wales and Scotland. Please place the order for collection and we will arrange delivery in 3 to 5 working days£565.70Add to basketQuick View -
 Add to basketQuick View
HORIZON GRAPHITE 20mm Porcelain Slabs
Our range of porcelain and sandstone slabs include delivery throughout mainland England, Wales and Scotland. Please place the order for collection and we will arrange delivery in 3 to 5 working days£565.70Add to basketQuick View -
 Add to basketQuick View
HORIZON GRIGIO 20mm Porcelain Slabs
Our range of porcelain and sandstone slabs include delivery throughout mainland England, Wales and Scotland. Please place the order for collection and we will arrange delivery in 3 to 5 working days£565.70Add to basketQuick View -
 Add to basketQuick View
RAJ GREEN INDIAN SANDSTONE 18MM
Our range of porcelain and sandstone slabs include delivery throughout mainland England, Wales and Scotland. Please place the order for collection and we will arrange delivery in 3 to 5 working days£495.00Add to basketQuick View -
Add to basketQuick View
RAJ GREEN INDIAN SANDSTONE 22MM
Our range of porcelain and sandstone slabs include delivery throughout mainland England, Wales and Scotland. Please place the order for collection and we will arrange delivery in 3 to 5 working days£475.00Add to basketQuick View -
 Add to basketQuick View
RASA BEIGE 20mm Porcelain Slabs
Our range of porcelain and sandstone slabs include delivery throughout mainland England, Wales and Scotland. Please place the order for collection and we will arrange delivery in 3 to 5 working days£564.19Add to basketQuick View -
Add to basketQuick View
RASA GREY 20mm Porcelain Slabs
Our range of porcelain and sandstone slabs include delivery throughout mainland England, Wales and Scotland. Please place the order for collection and we will arrange delivery in 3 to 5 working days£576.50Add to basketQuick View
Oakdale Fencing stock a wide range of paving and paving slabs suitable for any garden or outdoor project. Whether you're laying a patio, a driveway, a pathway or a garden seating area, our paving slabs are available in a variety of styles and finishes to suit all tastes and budgets. All our paving products are available for delivery throughout the UK.
Types of Paving Slabs
A reliable and cost-effective choice, pressed concrete paving slabs are one of the most popular paving options for gardens, patios and pathways across the UK. Available in a range of sizes and finishes, concrete paving slabs are strong, durable and easy to lay, making them a practical solution for both trade and domestic projects. Our pressed concrete slabs are manufactured to a consistent standard and built to withstand the demands of the British climate.
Indian sandstone paving is one of the most sought-after natural stone options available. Known for its warm tones, natural variation and timeless appearance, Indian sandstone paving slabs are an excellent choice for patios and garden areas where aesthetics are just as important as performance. Each slab is unique in colour and texture, meaning no two patios will ever look exactly the same. Available in a range of colours and sizes to suit any garden style.
Porcelain paving is a premium, modern paving option that has grown significantly in popularity in recent years. Manufactured to an exceptionally high standard, porcelain paving slabs offer a sleek, contemporary finish that is incredibly hard-wearing and virtually maintenance free. Unlike natural stone, porcelain is non-porous, making it highly resistant to staining, frost and algae growth. Available in a wide range of colours and styles, including wood and stone effect finishes, porcelain paving slabs are suitable for patios, driveways and commercial applications alike.
Finishing your paving project properly is just as important as the slabs themselves. Our range of paving edgings provide a neat, defined border to any paved area, helping to keep slabs in place and giving your project a clean, professional finish. Available in a selection of styles to complement the paving you choose.
Things to Consider When Choosing Paving Slabs
With so many paving options available, it's worth taking a little time to think through the right choice for your project before you order.
Purpose and Location: Consider where your paving will be laid and what it will be used for. A patio area used primarily for garden furniture and entertaining has different requirements to a driveway or a pathway that receives regular heavy footfall or vehicle traffic. Porcelain and pressed concrete paving slabs are particularly well suited to high traffic areas due to their strength and durability.
Style and Aesthetics: Think about the overall look you want to achieve. If you're looking for a natural, characterful finish then Indian sandstone paving is a wonderful choice. For a cleaner, more contemporary finish, porcelain paving slabs are hard to beat. For a more traditional, practical patio, pressed concrete paving slabs offer great value and a variety of finishes.
Maintenance: Different paving materials require different levels of upkeep. Natural stone such as Indian sandstone may benefit from periodic sealing to maintain its appearance and protect against staining. Porcelain paving, on the other hand, requires very little maintenance and can simply be washed down as needed.
Budget: Oakdale Fencing stock paving slabs at a range of price points to suit any budget. Pressed concrete paving slabs represent excellent value for money, whilst Indian sandstone and porcelain paving offer a more premium finish at a higher price point.
Area Size: Before placing your order, calculate the square meterage of the area you wish to pave. We always recommend ordering a small additional amount to account for any cuts during installation and to keep some spare slabs in case of damage in the future.
If you'd like advice on choosing the right paving for your project, our team are always happy to help. Give us a call on 02476 644601 or email help@oakdalefencing.co.uk.
Paving Installation Guide
Laying paving slabs is a manageable DIY project with the right preparation and materials. Follow the steps below for a long-lasting, professional result.
Equipment Needed: Tape Measure, String Line, Spade, Rubber Mallet, Spirit Level, Bolster Chisel or Angle Grinder, Trowel
Safety Wear: Gloves, Work Boots, Safety Goggles, Dust Mask
Materials: Paving Slabs, Sharp Sand, Cement, Paving Edgings, Jointing Compound or Mortar
Step 1: Mark out the area to be paved using a string line and pegs. Check that the area is square by measuring diagonally from corner to corner — both measurements should be equal. Allow for a slight fall away from any buildings or structures to ensure adequate drainage.
Step 2: Excavate the area to a depth of approximately 150mm to allow for a sub-base, mortar bed and the thickness of your paving slabs. Remove any vegetation, roots or loose material and compact the ground firmly.
Step 3: Lay a compacted sub-base of hardcore or MOT Type 1 to a depth of around 100mm. Compact thoroughly using a plate compactor or hand tamper. A solid, well-compacted sub-base is the foundation of any good paving project and will prevent slabs from sinking or moving over time.
Step 4: Mix a bed of mortar using a ratio of approximately 4 parts sharp sand to 1 part cement. Lay the mortar bed to a depth of around 40–50mm and use a trowel to create a consistent, level surface. For porcelain paving slabs, we recommend using a full bed of mortar rather than spot bedding to ensure adequate support.
Step 5: Carefully place each paving slab onto the mortar bed and tap firmly into position using a rubber mallet. Check regularly with a spirit level to ensure each slab is level and that the correct falls are being maintained. Leave consistent gaps between slabs for jointing.
Step 6: Cut slabs to fit any edges or awkward areas using an angle grinder or bolster chisel. Always wear appropriate safety equipment when cutting paving slabs.
Step 7: Once all slabs are laid and the mortar has cured (allow at least 24 hours), fill the joints between slabs using a jointing compound or a brush-in jointing mortar. Brush away any excess and allow to set fully before walking on the surface.
Step 8: Install paving edgings around the perimeter for a neat, finished appearance and to prevent slabs from shifting over time. Our edgings for paving are available to order online and can be delivered along with your slabs.
